|
|


 07-08-2006, 02:49 AM
|
#1 |
|
|
I was looking for a good guide for cleaning my Dslr sensor, as I have a lot of dust probs on my Dslr.
I found Alecto's old thread in google's cache. Hope he doesn't mind me resurrecting it, as IMO it is very useful. - - - - - - - - - - - - - - - - - - - - - - - - - - - - - - - - - - - - - - - - - - - - - - - - - - - - - - - - - - - - - - - - - - - - - - - - - - - - - - - - - - - - - - - - - - - - - - - - - - - - - - - - - - - - - - - - Written by Alecto Thought this might be useful as there are quite a lot of people with DSLRs on FM now! There are a lot of methods out there, but for me this is the easiest and safest for newbies, and it works like a charm. What you need to buy: Make-up Brush, basically a brush with very fine bristles, can be found at just about any large chain supermarket for about £1 or so. A hand blower of some kind (not canned air), something you squeeze that blows out a very gentle flow of air. You can buy these from some shops, however you can you just about anything with a small nozzle that is squeezable. Just make sure it's clean, and contains nothing but air before you use it! And that's it! (assuming of course you have a camera, 2 hands and a water supply in your house.  ) )The Brush: 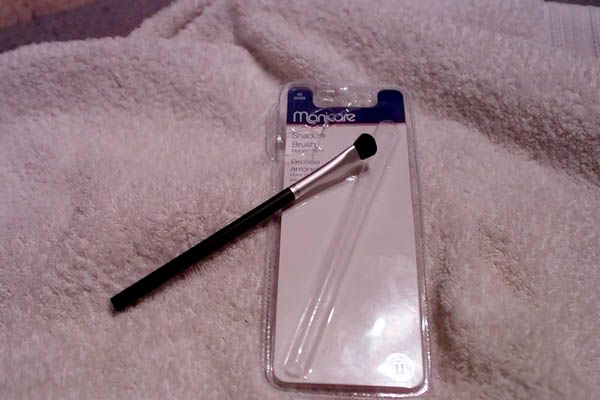 Ideally a square headed brush is best, however as long as it is one with the very fine bristles it'll work. Step 1. Take a photograph of the sky or bright, but solid coloured thing (well lit wall for example) at your highest aperture, for me this is f/32, although it will vary with different lenses. Upload the photograph and load it into photoshop and select the "Auto Levels" option. (I'm not familiar with many other image editing programs, but most will have a very similar action) If you see lots of small/large specks (depending on the amount of dust) you need to clean your sensor! Here's an example of a very dirty sensor: 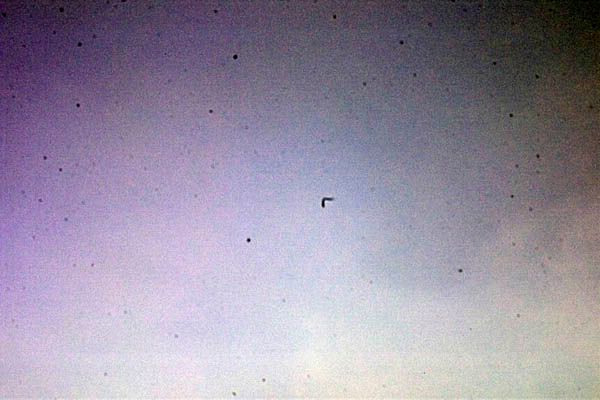 Step 2. If you see quite a lot of specks of dust, then it's best to clean your sensor, especially if they're visible before doing the auto levels action. Firstly clean the brush with water, preferebly distilled (although it isn't essential). Once the brush is completely dry you can begin cleaning. Step 3. Make sure you have a fully charged battery, or a DC Adaptor plugged into your camera. Remove the lens from your camera and put the camera into the cleaning mode (if you don't know how to enable this on your camera RTFM!) On my Canon D30 it is in the custom function menu: 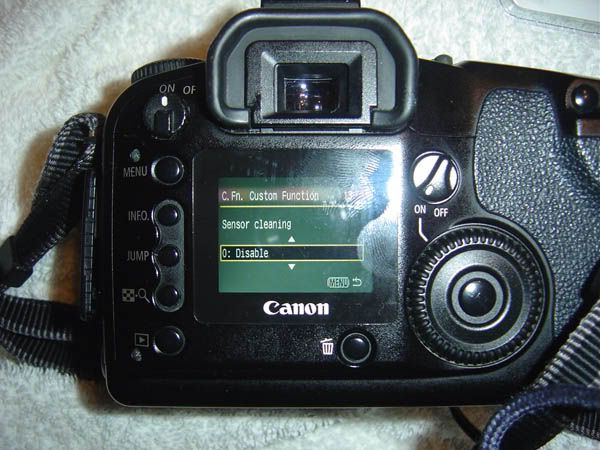 Hopefully now you should be able to see the sensor when you look down into the lens mount. eg: 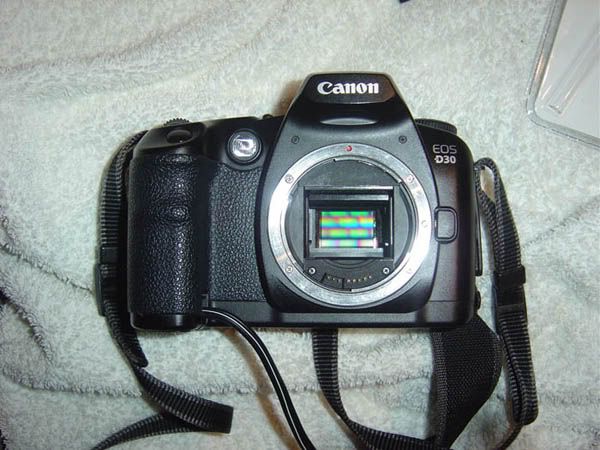 Very gently move the brush from side to side several times across the sensor, bare in mind you're not actually touching the CMOS/CCD but the thin film that lays above it, so don't be worried about static. After around 5 passes, blow onto the brush with the blower to get rid of any dust you've picked up from the sensor, now repeat a couple more times. Once you've finished, brush the area around the sensor and the bottom of the mirror, then hold the camera upside down and blow into the lens mount with your blower (this will get rid of any excess dust and won't let it settle). Step 4. Repeat Step 1. If your sensor looks like this:  You're done! If not, repeat the process of cleaning the sensor once more and hopefully you'll be left with a thoroughly clean, good as new, sensor. edit: just as a disclaimer, you do this at entirely your own risk, so if it goes wrong, don't blame me! . |

|


«
Previous Thread
|
Next Thread
»


 Threaded Mode
| Currently Active Users Viewing This Thread: 1 (0 members and 1 guests) | |
|
|

